Do you ever feel like your keyboard could be better? Maybe the keys are too clunky, or the layout doesn't quite fit your hands comfortably. Well, good news! You can design and make your very own custom mechanical keyboard, tailored exactly to your preferences. In this guide, we'll walk you through the exciting process of designing and manufacturing your personalized keyboard, complete with custom cases, plates, keycaps, and even tenting kits.
Why Go Custom?
You might wonder, why bother making a custom keyboard when there are plenty of great options available on the market? Well, the beauty of building your keyboard lies in the ability to tailor it exactly to your preferences. From the type of switches to the layout and even the design of the case, everything is up to you. Plus, it’s a fun and rewarding DIY project that allows you to learn more about how keyboards work.
A Step-by-Step Process for Building Your Own Custom Mechanical Keyboard
Let's dive into the world of custom mechanical keyboards and explore how you can create a personalized typing experience like no other.
Step 1: Designing Your Keyboard Layout
The beauty of creating your own mechanical keyboard lies in the freedom to customize every aspect of it. From the layout and size to the key switches and keycaps, the possibilities are endless. But before you start soldering components together, you'll need to have a clear idea of what you want your keyboard to look and feel like.
First, decide if you want a small, medium, or large keyboard. A small keyboard might not have all the keys, like the number pad, but it can save space on your desk. A medium-sized keyboard is like the ones you often see, with all the keys you need for typing and gaming. And a large keyboard has extra keys, like the number pad and function keys, which some people find helpful for work tasks.

There are also unique layouts, like split keyboards or ortholinear designs. Split keyboards are divided into two halves, which can be more comfortable for some people to use. Ortholinear keyboards have keys that are all in a straight line, which can make typing feel different compared to a regular keyboard. You can customize your layout to fit your preferences and how you like to type.
To design your layout, you can sketch it out on paper or use online tools to create a digital version. Think about where you want each key to go and how you want them to be arranged. Some people like to have keys in a straight line, while others prefer a more staggered layout. You can also decide if you want special keys, like ones for controlling music or changing the volume.
Step 2: Choose Your Components
Now that you've got your keyboard design planned out, it's time to pick the parts you'll need to bring it to life. There are a bunch of different pieces that make up a keyboard, and you get to decide which ones you want to use. Here's a quick rundown of what you'll need to choose:
1. Switches
These are the individual keys that you press. There are many different types of switches available, each with its feel and sound. Some are clicky and make a sound when you press them, while others are silent. Some are light to press, while others need more force. Take your time to research and find the switches that match your typing style and preferences. You can find switches from various brands like Cherry MX, Gateron, and Kailh, each offering a wide range of options to suit your needs. Discover a variety of keyboard switches available at Keychron, such as the Kailh Switch Set, Gateron Mechanical Switches, and Cherry MX Switches. Choose the perfect switch to match your style and elevate your typing experience with Keychron.

2. PCB (Printed Circuit Board)
This is the heart of your keyboard, responsible for registering key presses and sending the signal to your computer. It's important to choose a PCB that's compatible with your chosen switches and layout. Some PCBs are programmable, meaning you can customize how each key behaves, while others have fixed layouts. Make sure to check the specifications and features of different PCBs before making your choice.
3. Case
The case is the outer shell of your keyboard – it's what holds everything together and gives your keyboard its shape. Cases come in many materials like aluminum, plastic, or wood, and they can have different designs and finishes. Think about what kind of look and feel you want for your keyboard, and choose a case that matches your style.
4. Plate
The plate sits between the switches and the PCB, providing support and stability. It also helps to align the switches properly so that they sit evenly on the PCB. Plates are usually made from materials like steel or aluminum, and they come in different layouts to accommodate different switch sizes and configurations. Consider what type of switches you're using and how you want them to feel, and choose a plate that complements your switches and PCB.
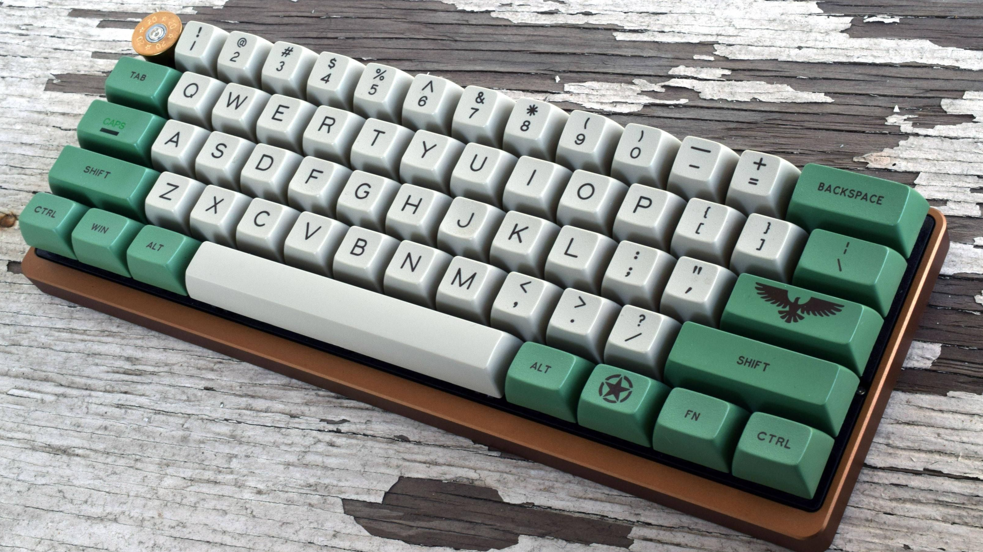
5. Keycaps
These are the covers that go over the switches and determine the look and feel of your keyboard. You can choose keycaps made from different materials like ABS or PBT, and you can even find special keycaps with unique designs or textures. Think about what colors and styles you like, and pick keycaps that match your personality. Keychron offers a wide range of keyboard keycaps, catering to various preferences, from Artisan keycaps to Cherry Profile keycaps, Double-Shot PBT keycaps, Double Shot ABS keycaps, and OEM Dye-Sub PBT options. Find the perfect combination of quality and variety at Keychron.

6. Tenting Kit
If you're concerned about ergonomics or wrist strain, you might want to consider adding a tenting kit to your keyboard. Tenting kits raise the sides of the keyboard, allowing your hands to rest in a more natural position while typing. There are many different tenting kits available, from simple stands to adjustable frames, so you can find one that suits your needs and preferences.
Once you've picked out all your components, you're one step closer to building your very own custom keyboard! Browse through a range of mechanical keyboard accessories at Keychron, including keycaps, switches, cases, plates, cables, wrist rests, and more, for a customized typing experience. Elevate your typing journey with Keychron's high-quality products.
Step 3: Customize Your Keycaps
Keycaps are the little pieces on top of each key on your keyboard. They're like tiny hats for your keys! Customizing your keycaps means making them look and feel just the way you want.
1. Choosing Materials
Keycaps come in different materials, like ABS and PBT. These materials affect how the keycaps feel and how long they last. ABS keycaps are smooth and shiny, while PBT keycaps are rougher and more durable. There are also keycaps made from materials like metal or resin, which can give your keyboard a really fancy look.
2. Picking Colors
You can choose different colors for your keycaps to make your keyboard look cool and unique. Maybe you like bright colors, or maybe you prefer something more subtle. Some people like to mix and match different colors to create a rainbow effect or a theme for their keyboard. The possibilities are endless!
3. Adding Designs
Some keycaps have special designs or pictures on them. These are called artisan keycaps. Artisan keycaps are handcrafted by artists and come in a variety of intricate designs and themes. They're like tiny pieces of art that you can display on your keyboard. They can be shaped like animals, plants, or even characters from your favorite games or movies. Adding artisan keycaps can give your keyboard a personal touch and make it stand out. Keep in mind that artisan keycaps are often more expensive and may have limited availability.

4. Deciding on Legends
Legends are the letters, numbers, and symbols printed on the keycaps. You can choose different fonts and styles for your legends. Some keycaps even have blank legends, so you can customize them however you like. Keycaps also come in different profiles, which means the shape and height of the keycap. Common profiles include OEM, Cherry, and SA.
5. Exploring Profiles
Keycap profiles refer to the shape and height of the keycaps. There are several profiles to choose from, including OEM, Cherry, SA, and DSA. Some profiles are tall and sculpted, while others are short and flat. Each profile feels a little different to type on, so you can pick the one that feels best for you.
Customizing your keycaps is a fun way to make your keyboard truly yours. Whether you're into bright colors, and fancy designs, or just want something simple and clean, there's a world of keycap options out there waiting for you to explore!
Step 4: Design Your Case
Now that you've chosen the parts for your custom mechanical keyboard, it's time to think about the case. The case is like the house for your keyboard; it holds everything together and gives it its shape.
1. Materials
Cases can be made from different stuff, like metal, wood, or plastic. Each material has its pros and cons. Metal cases are strong and durable but can be heavy. Wood cases look nice and feel warm but might need more care. Plastic cases are lightweight and come in many colors but may not feel as sturdy.
2. Shape and Size
Think about how big you want your keyboard to be. Do you need a full-sized keyboard with a number pad, or do you prefer a smaller one without it? This choice will affect the shape and size of your case. Some people like compact keyboards because they take up less space on the desk, while others prefer larger ones for their extra keys.
3. Design
You can design your own case using computer programs called CAD software. CAD stands for Computer-Aided Design. These programs let you create 3D models of your case. You can play around with different shapes, angles, and details until you find the one you like. If you're not into designing, you can also buy pre-made cases in various styles and colors.
4. Cutouts and Features
When designing your case, think about where you want the USB port to go and if you want any extra features like LED lights. You'll also need to make cutouts for the switches and the circuit board to fit into the case properly.
Designing your case is an important step in making your custom keyboard. It's where you can get creative and make your keyboard look and feel just the way you want it to.
Step 5: Design Your Plate
The plate is like the floor of your keyboard. It's where all the keys sit on top of. Just like with the case, you have choices for materials. Plates can be made from metal, like aluminum or stainless steel, or even plastic.
When designing your plate, you need to make sure it matches the layout of your keys. If you're using a standard layout, you can find pre-made plates that fit. But if you're going for a custom layout, you might need to design your own plate. Again, you can use CAD software to do this.
Once you've got your designs ready, you can either make them yourself if you have the tools and skills, or you can find a company that can make them for you. Then, when they're done, you'll have the perfect case and plate for your custom keyboard!
Step 6: Assembling Your Keyboard
Once all the components are gathered, it's time to assemble them. Here’s a basic guide to assembling your custom keyboard:
1. Prepare Your Workspace
Find a clean, well-lit area to work in, and gather all your tools and components.
2. Mount the Switches
Start by mounting the switches onto the PCB. Make sure they’re aligned properly and securely solder them in place.
3. Install the Plate
Place the plate over the switches and screw it into the case. This will provide stability and support for the switches.
4. Add the Keycaps
Now it’s time to add the keycaps to your switches. Simply press them onto the stems until they click into place.
5. Attach the Case
Finally, attach the case to the bottom of the keyboard and screw it into place. Confirm that all elements are aligned properly and securely fastened.
6. Optional
Install Tenting Kit: If you’re using a tenting kit, install it according to the manufacturer’s instructions to raise the angle of the keyboard.
Step 7: Tenting (Optional)
Tenting is like giving your keyboard a comfy bed to sleep on. But really, it's about making your typing experience more comfortable and healthy for your hands and wrists.
Imagine holding your hands out in front of you, like you're typing on a keyboard. If your hands are flat, it can make your wrists bend uncomfortably. Tenting fixes this. It lifts the sides of your keyboard so your hands can sit more naturally, like when you hold a book.
You can buy tenting kits or even make your own if you're feeling crafty. Some people use special stands or even 3D printers to create custom tenting setups. It's about discovering the approach that works best for you.
Tenting isn't just about comfort; it's also about taking care of your body. By typing on a tented keyboard, you can reduce strain on your wrists and fingers, which can help prevent problems like carpal tunnel syndrome. So, if you spend a lot of time typing, tenting might be a small change that makes a big difference in how you feel.
Step 8: Testing and Troubleshooting
Before celebrating your new creation, it's essential to test it thoroughly. Connect your keyboard to your computer and check that each key registers correctly. If you encounter any issues, double-check your soldering and connections.
Step 9: Personalizing Your Keyboard
Now that your custom mechanical keyboard is assembled and ready to use, it's time to add the finishing touches to make it truly your own. Personalizing your keyboard allows you to add unique touches and make it stand out from the crowd.
One way to personalize your keyboard is by customizing the keycap legends. You can choose from a variety of fonts, colors, and symbols to create a layout that reflects your personality and preferences. Whether you prefer a sleek and minimalist design or a bold and colorful aesthetic, there are endless possibilities for customization.

Another way to personalize your keyboard is by adding custom keycap designs or artisan keycaps. Artisan keycaps are handcrafted by talented artisans and come in a wide range of designs, from cute animals to intricate sculptures. Adding artisan keycaps to your keyboard can give it a one-of-a-kind look and make it truly unique.
Additionally, you can further personalize your keyboard by programming custom macros and shortcuts. Most custom mechanical keyboards come with software that allows you to remap keys and create custom macros for specific tasks. By programming your keyboard to your workflow, you can increase efficiency and productivity while adding a personal touch to your typing experience.
Conclusion
Designing and manufacturing your custom mechanical keyboard is a rewarding journey that allows you to unleash your creativity and create a truly unique typing experience. From choosing the perfect switches to designing custom keycaps, every step of the process is an opportunity to make your keyboard your own.
Discover premium custom mechanical keyboards for Mac, Windows, iPhone, and Android at Keychron. Explore top models like the Keychron K3 Pro, Keychron V6, Keychron Q3, and Keychron Q1, known for their high-quality craftsmanship. Dive into a variety of mechanical keyboard parts, including keycaps, switches, cases, plates, cables, wrist rests, and more, to personalize your typing experience. Elevate your typing journey with Keychron’s range of sleek and innovative designs tailored to every user’s preference.